


- PUMPKINS! - this will work on real pumpkins too, but I wanted to be able to keep and reuse mine in future halloweens so I used some polystyrene pumpkins and some paper mache pumpkins in various sizes.
I got most of these from Craftmill and some from a local craftshop. I was really pleased with the quality and price of these from craftmill and the delivery was pretty speedy too.
- Paints - whatever colours you like or whatever you have around, however I recommend using a mix of chalk paints (explained below) and metallic paints. Also see my note about spray paint below!

- Paint brushes
- A palette or something to mix paint on
- Old cardboard/ cloth to protect your surfaces
Step one - Pick your paints!

One of the best things about this DIY is that you can paint the pumpkins ANY COLOUR YOU LIKE! I like orange pumpkins, but I LOVE white pumpkins, and we don't really see real ones much in Europe, so this was the main colour I wanted - white with gold accents. I also wanted to keep them a little traditional so I added a couple of orangey/ copper ones and of course a couple of pure gold ones!
Step two - Get painting!
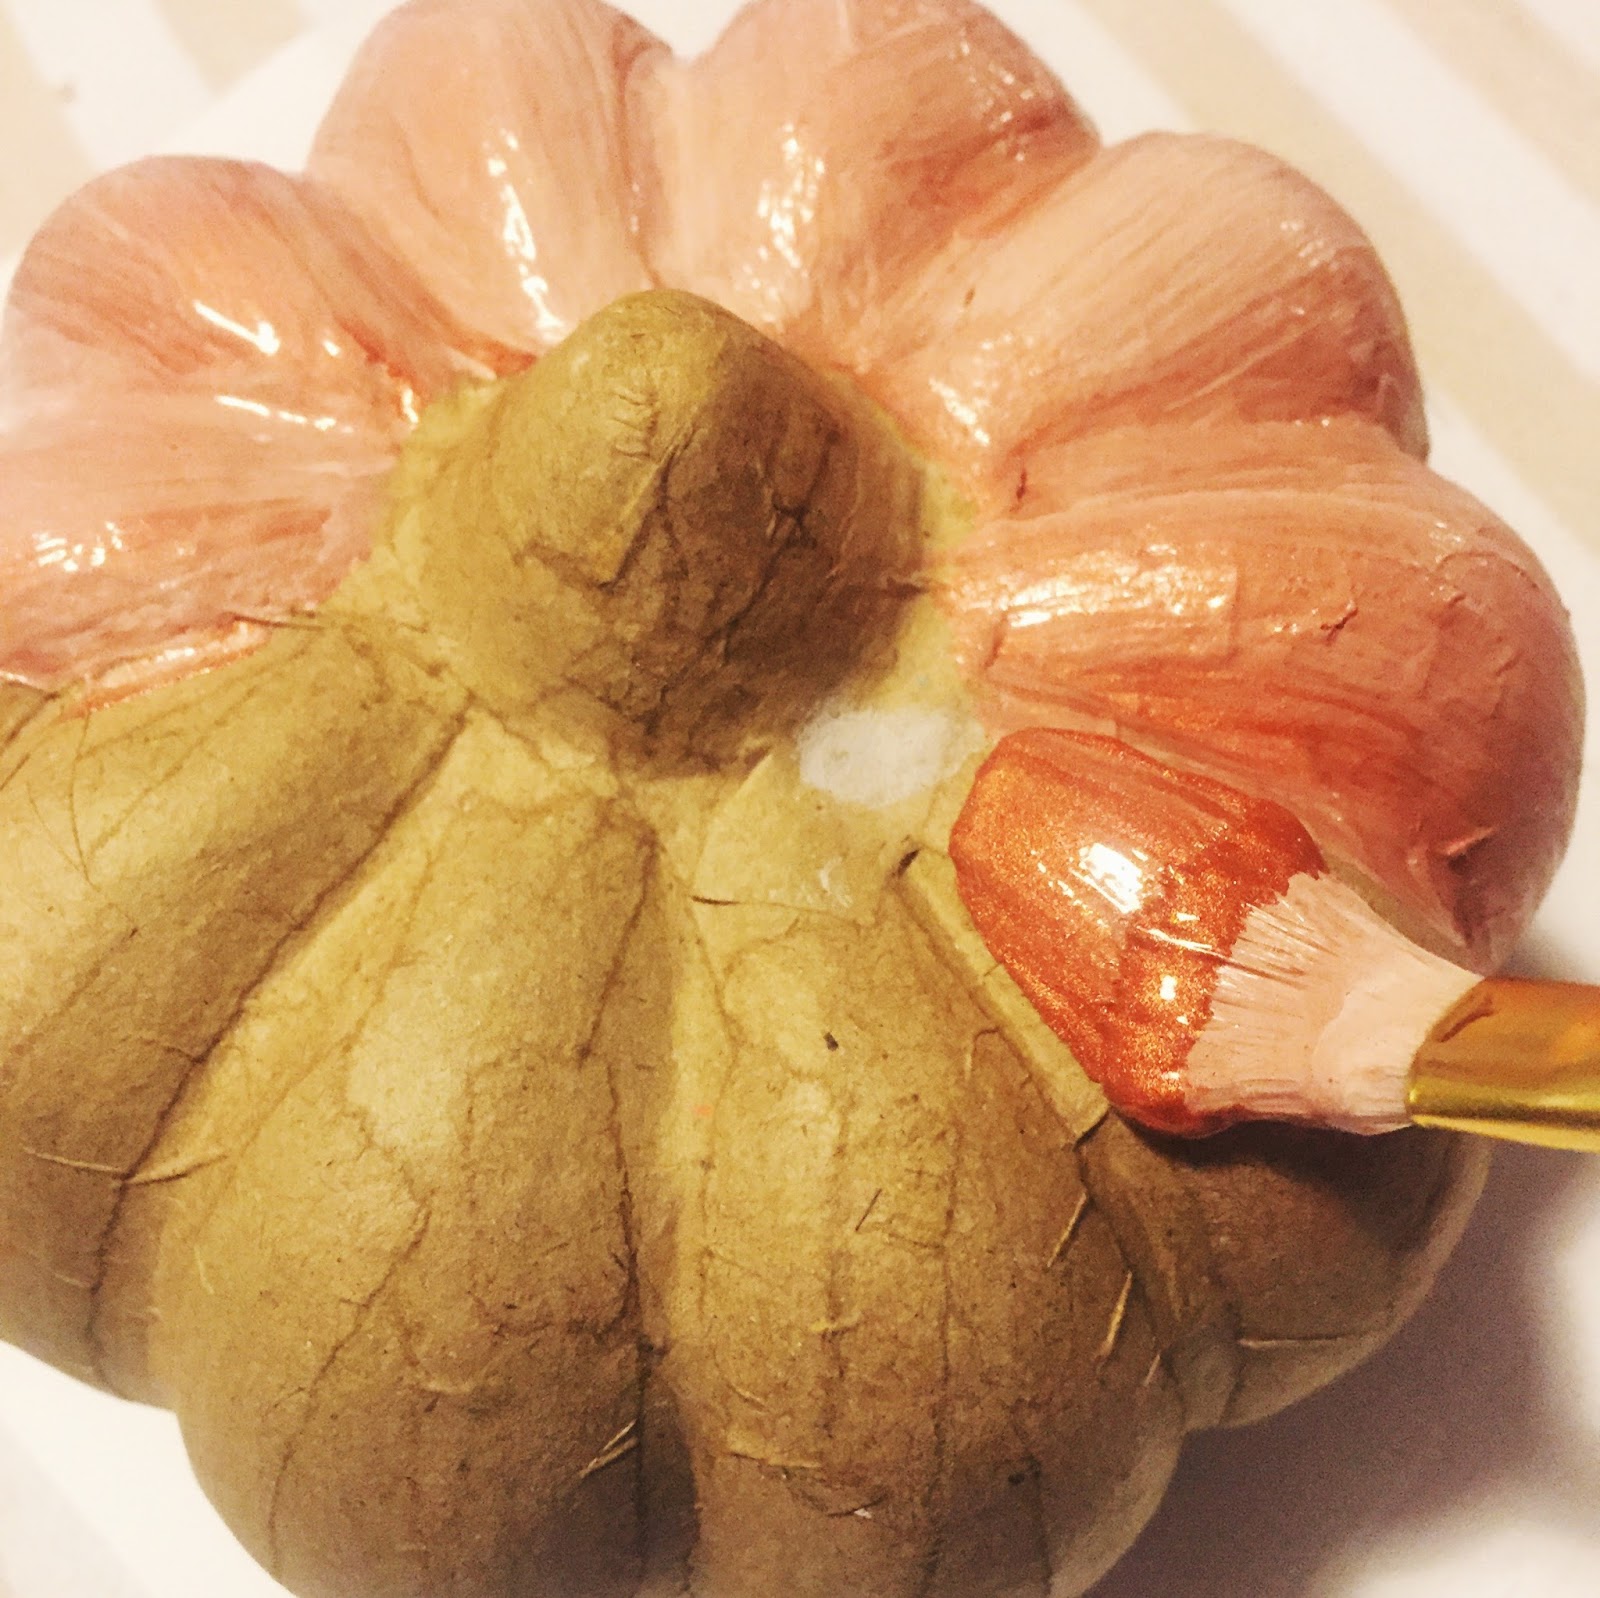
I mixed the gold and copper paints with some peach or cream chalk paint too, to get different shades and textures. Basically just play around with paints and have fun!

WORD OF WARNING: SPRAY PAINT ERODES POLYSTYRENE!

Did you know this?? I did not ! Until I added a little spray of gold to the top of a couple of the already chalk painted polystyrene pumpkins and suddenly they started to melt! Luckily in this case the chalk paint stopped it totally ruining them and I think it actually added to the affect somewhat - but be careful!

As you can see I was doing this DIY at the same time as the DIY Faux Insect Taxidermy one!
Step four; display!
Depending on the sizes and shapes of pumpkins you've collected, your display could look anyway you like; one rule: pile those pumpkins up!

Here is my mantel before; lots of plants (some real some not) mercury glass, candles and a few quirky bits and bobs.
Also- my framed REAL flamingo feathers I collected in Barcelona Zoo!

This is between- me trying to figure out how I wanted the pumpkins to look, I set them all up there and I was a bit dissapointed to be honest! I'd expected more of a WOW factor, and they all seemed quite flat! ...my solution?? BOOKS.


I have tons of cool old books, I collected them before my wedding thinking I might use them to display pots of flowers on on the tables but never got round to that. There are at least 3 different vintage copies of Alice in Wonderland there!

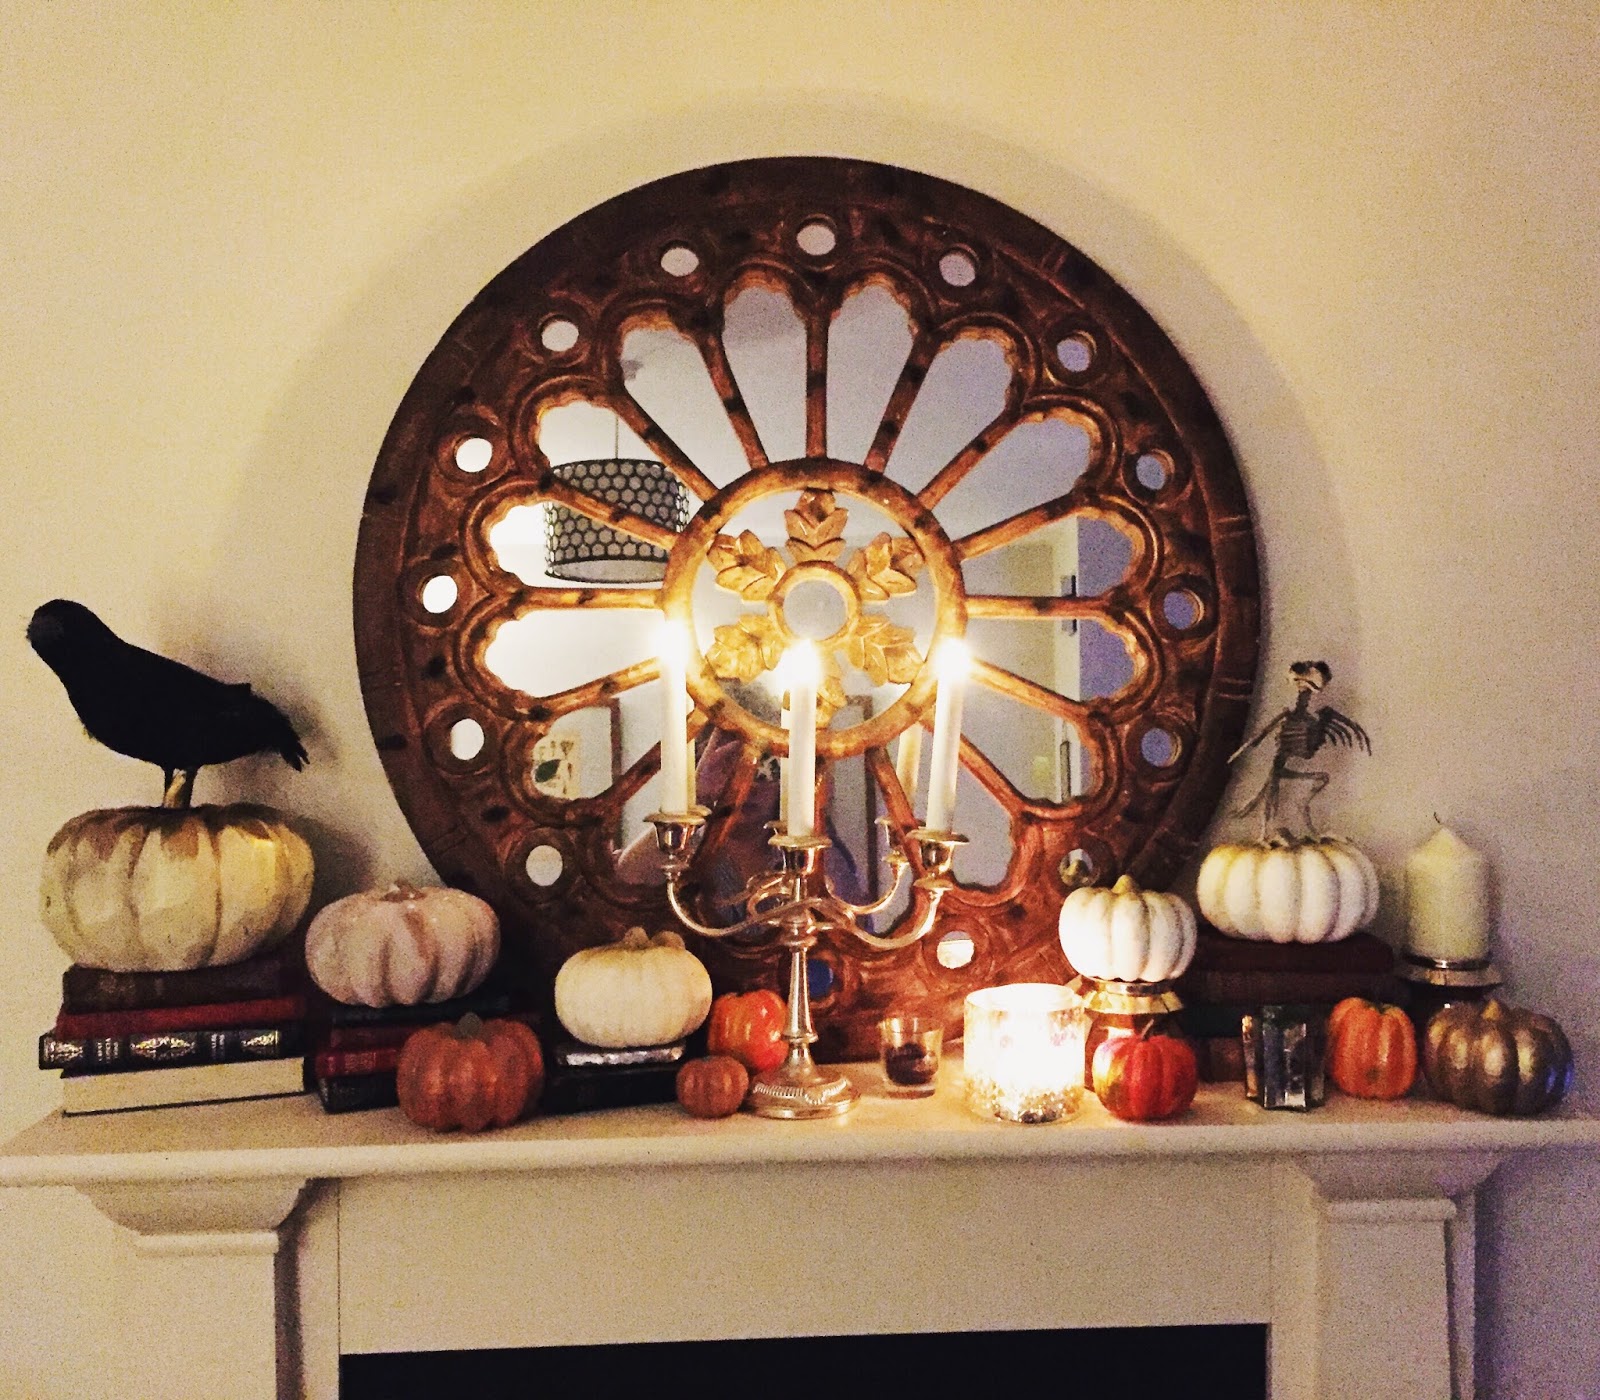
So I piled the books high, and popped the pumpkins on and added an antique candlestick, some (fake) candles and a couple of faux crows... and I LOVE how it turned out!
What do you think?
If you make these for yourself please tag me on instagram ( @lindzibun) or feel free to comment and tell me how it went on this post!
Love,
Lindzi x
No comments:
Post a Comment
Thanks for reading this post, what do you think? Let me know below! Keep it polite please :) #NoTrollsAllowed